bag making machine installation
Installation of a bag making machine is a critical phase that transforms a delivered machine from a crated assembly into a fully operational production unit. Proper installation ensures the machine runs smoothly, produces high-quality bags, and has a long service life. The process involves site preparation, unpacking, positioning, connecting utilities, leveling, alignment, and commissioning. This guide covers each step in detail, including required tools, safety precautions, typical timelines, and common pitfalls. Whether you are installing a new machine or relocating an existing one, following a structured installation procedure minimizes downtime and prevents damage to the equipment.
Site preparation begins before the machine arrives. The installation area must have adequate floor space for the machine plus operator access and maintenance clearance – typically 1-2 meters around the perimeter. The floor must be level, flat, and able to support the machine's weight (often 3-10 tons) – a concrete slab of sufficient thickness (150-200 mm) is recommended. Mark the machine's footprint and anchor bolt positions based on the supplier's foundation drawing. Ensure utilities are available: electrical supply matching the machine's voltage, phase, and amperage; compressed air at the required pressure and flow; cooling water (if needed) with proper inlet/outlet connections. Install a main power disconnect switch and a dedicated circuit breaker. Also, plan for lighting and ventilation in the area.
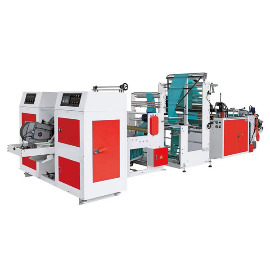
Plastic Bag Making Machine
Unpacking and positioning: Upon arrival, inspect the crate for shipping damage. Unpack carefully, removing the outer packaging and any internal bracing. Use a forklift or overhead crane with adequate capacity to lift the machine – consult the manual for lifting points. Position the machine according to the layout plan, leaving enough space for the unwind stand, stacking conveyor, and operator panel. Place the machine on the anchor bolts (if used) or on vibration-damping pads. Roughly level the machine using the leveling feet or shims. Connect the electrical supply cable to the main disconnect, ensuring correct phase sequence. Connect compressed air line with an inline filter and regulator. Connect cooling water lines (if required) with shut-off valves. Ensure all connections are tight and comply with local codes.
Leveling and alignment: Precise leveling is essential for the machine's frame to avoid twisting, which causes misalignment of sealing bars, rollers, and cutting mechanisms. Use a precision spirit level or laser level to level the machine in both longitudinal and transverse directions. Adjust leveling feet or shims until the machine is within 0.5 mm over 1 meter. After leveling, tighten anchor bolts to the specified torque. Then, check the alignment of all roller shafts and sealing bars – they should be parallel to each other and perpendicular to the film path. Use a dial indicator to measure runout. Any misalignment can cause film wrinkling, uneven seals, and premature wear. The supplier's technician typically performs this alignment during commissioning.
Commissioning and test run: Once utilities are connected and the machine is leveled, the commissioning phase begins. Start with electrical safety checks: verify grounding, test emergency stop circuits, and check motor rotation direction. Power up the control system and upload the machine's software and recipe settings. Test all actuators (pneumatic cylinders, servo motors) in manual mode to ensure proper operation. Then, load a sample film roll, thread the film through the machine according to the manual, and set initial parameters (tension, sealing temperature, pressure, dwell time, cut length). Run the machine at low speed (10-20% of rated) and check for any unusual noise, vibration, or film misalignment. Gradually increase speed while monitoring bag quality – seal strength, dimensions, registration. Make adjustments as needed. The commissioning typically takes 2-5 days, including operator training. After successful production of defect-free bags at rated speed, the site acceptance test (SAT) is completed, and the machine is officially handed over.
Post-installation checklist: Ensure all guards and safety interlocks are in place and functional. Verify that all sensors (registration, tension, temperature) are calibrated and accurate. Confirm that the machine's parameters are saved as a recipe for future use. Train operators on startup, shutdown, and basic troubleshooting. Establish a maintenance schedule. Keep a log of installation activities, adjustments, and test results for warranty and future reference. By following a thorough installation process, you ensure that the bag making machine is set up correctly, minimizing teething problems and enabling immediate productive operation, while also protecting your investment and ensuring operator safety.